Meanwhile, back in space...

Kurt
Chief Petty Officer
Posts: 140
Joined: 11 Jul 2009, 00:11

Meanwhile, back in space...

Post by Kurt »

Okay, I'm going to post all my ad hoc questions here from now on, so I don't have you poor guys jumping all over the place.

The story so far... I got Truespace solely for producing animations of realistic objects, so that I can convert them to .AVIs, and put them into my short amateur "home" movies as shots.

So far, with your excellent advice and generous help, (not to mention patience), I've learned how to create objects and manipulate them, to animate them, to follow them with a camera, etc, plus all the things I've learned from actually studying the Manual....

BUT, there's two things I still don't get. I can't seem to apply a jpg or any kind of picture as a "background", or as a "floor", (meaning the ground beneath the object.)

I know the Preferences boxes, where I can select a background picture or a colour, but, when I click on the background bar, I get a box of Textures. Only one of these is an actual JPG, (a picture of a forest scene), and I can get that as a background. But I've got other photographs which I'd like to use as backgrounds. But even when I save them to the Textures library, they still won't appear when I click on them.

Thanks for your help, again.. ;)

Kurt
v3rd3
Lieutenant Commander
Posts: 1191
Joined: 21 May 2009, 20:04

Re: Meanwhile, back in space...

Post by v3rd3 »

You can create a skybox for your atmosphere. You can use either a cube or a sphere for this....

In the case of a sphere simply create a sphere that surrounds all of the objects in your scene. Then invert the faces of the sphere (make the outside the inside) so that when you apply your texture it will show on the inside of the sphere. Make sure your camera/camera path is inside the sphere when you record your animation.

Another approach is to use large plane objects. Especially if you are creating stills instead of animation.

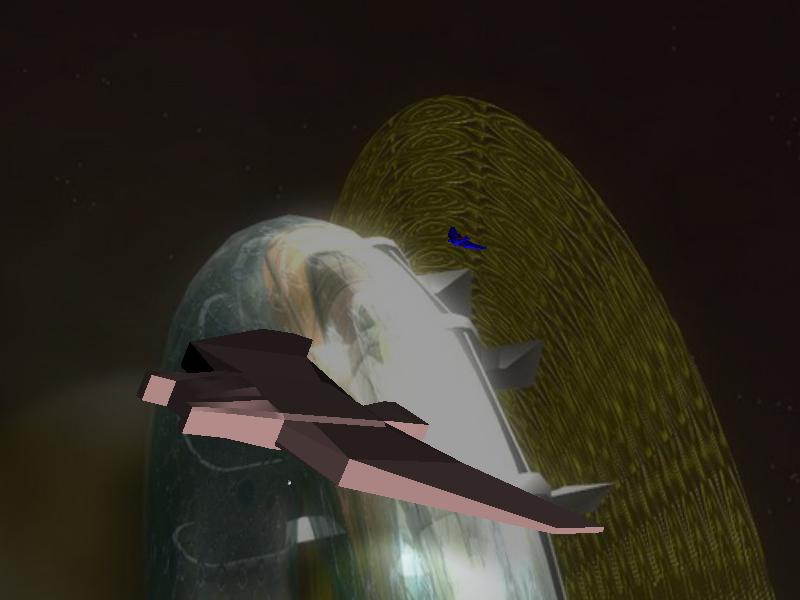
In the example here I created a space station and a couple of simple ships for a proof of concept. I then created a hint of a planet and starfield using the GIMP and applied it to a plane as the background for this shot.
Attachments
terran blunt samples.jpg
Kurt
Chief Petty Officer
Posts: 140
Joined: 11 Jul 2009, 00:11

Re: Meanwhile, back in space...

Post by Kurt »

Aah, that would be the "skydome" mentioned in one of Prodigy's ? posts, I think...?

Thanks, v3rd3, I try that.

Presumably, if I used a plane, all I'd do is create a plane from Primitives, set it up on one edge, then apply a starfield texture to it... Sort of like a "scenic flat" as used on a theatre stage?

That's helpful, v3rd3, but I'm still stumped as to how to actually use a photograph as a texture, so I can apply it to that plane.

I've imported jpg photos into my materials and textures libraries, but when I drag them to an object, they won't attach. Obviously I need to make Truespace see those jpgs as texture files?

Do they have to be converted somehow before this can happen?

Thanks,
Kurt.
User avatar
spacekdet
Captain
Posts: 1810
Joined: 27 May 2009, 15:00
Type the number ten into the box: 10
Location: On the day shift at the Utility Muffin Research Kitchen

Re: Meanwhile, back in space...

Post by spacekdet »

Very basic (6.6 or Model side) tutorial on applying textures here
Might get you started.
If using Workspace side to texture...welllll, you have my sympathy.
Skydome tut here

No need to convert anything, just navigate to the desired jpg file and apply it in the 'Color' channel using the 'paint' or 'paint over' tools in the Material Editor. More precise than all this dragging and dropping malarkey.
Kurt
Chief Petty Officer
Posts: 140
Joined: 11 Jul 2009, 00:11

Re: Meanwhile, back in space...

Post by Kurt »

spacekdet wrote:Very basic (6.6 or Model side) tutorial on applying textures here
Might get you started.
If using Workspace side to texture...welllll, you have my sympathy.
Skydome tut here

No need to convert anything, just navigate to the desired jpg file and apply it in the 'Color' channel using the 'paint' or 'paint over' tools in the Material Editor. More precise than all this dragging and dropping malarkey.
Pretty sure I've been doing all that stuff with the material editor, Spacekdet, but obviously I'm not doing something right. Thanks for the tut. I printed it out this time so I can refer to it without hopping back and forth.

I already had the skydome tut, so when I finally get texturing right, I'll get my skydome done too.

Using Model side, not the Dark Side, to do textures. :)

Thanks, and cheers. :bananathumb:

Kurt
Kurt
Chief Petty Officer
Posts: 140
Joined: 11 Jul 2009, 00:11

Looking at look at...

Post by Kurt »

Speaking of the "Look at" feature, which we weren't but we will, is it the same thing as seeing on the screen exactly what the camera is seeing?

Because I tried to get that. Had a camera set up pointing at a corner of a cube, and tried to find the button to bring up the view that the camera saw. When I hit the "look at" button, what I got was the cube and the camera, and ...yada yada ...


EDIT: I finally realised what I've been doing wrong with all the tools I've been trying to learn.

When I select a tool and do something with it, after I've finished I automatically right click to get out of that tool, then try to continue on. But of course nothing happens because I don't have the tool any more!! I now know that I have to remain in the tool mode to do stuff.

What a silly duffer! :oops:

Onward and upward!! :superbanana:

Kurt.

Return to “Work in Progress”